
Access Your RPi Headless
Posted
on
in
Technology
• 900 words
• 5 minute read
Tags:
PuTTY, Raspberry Pi, RDP, Remote, SSH, XRDP
This post is for people who have a Raspberry Pi (RPi for short) and want to control their RPi remotely, from a Windows computer on the network.
DISCLAIMER: I AM NOT RESPONSIBLE FOR ANY DAMAGE CAUSED BY YOUR USE OF THE INSTRUCTIONS ON THIS POST.
This guide makes a few assumptions. First, you have installed Debian Linux (or similar) on your RPi. Second, you know how to use the command line to install software and execute a few other commands. If you meet those criteria, you should be able to follow this guide.
Let’s get started by enabling SSH on the RPi.
Enable the SSH Server on the RPi
- Run this command:
sudo raspi-config - If you see an “SSH” (or something similar) command in the list, use the arrow keys to go down to it and press enter. Then skip to Step 5. If you do not, don’t panic, it’s just buried a little deeper.
- Move down the list using the arrow keys to the “Advanced Options” item and press enter
- Move down the list using the arrow keys to the “SSH” (or similar) command and press enter
- Select “Enable” using your arrow keys and press enter
Now you can access your RPi using a SSH client. The SSH client needs to access the RPi using an IP address. To set this up, you need to give your RPi a static IP address on your network and then you can access it from the client. If that doesn’t make sense at all, just follow the instructions. It should work.
Run this command:
sudo ifconfig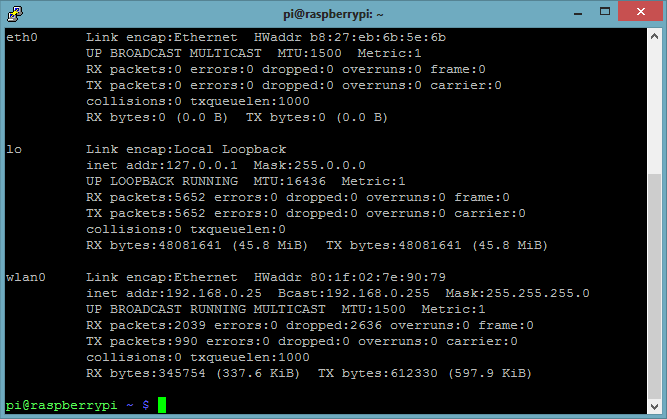
Output of ifconfigFind the IP address of the RPi. For me, I am using a wireless adapter so I have to look at “wlan0” for the information I need. If you are using a wired connection, look in eth0. Regardless of what interface you are using, you will need to look for the
inet addr. For me it looks like this:inet addr:192.168.0.25 Bcast:192.168.0.255 Mask:255.255.255.0What you need is the numbers with the periods (dots) in between. In my case they are
192.168.0.25. Take note of this somewhere as you will need it later.Run this command:
sudo nano /etc/network/interfacesFind the spot in the file that reads something like this:
iface default inet dhcpand edit it to look like this:
iface default inet static address 192.168.*.* netmask 255.255.255.0 gateway 192.168.*.*replacing the stars in “address” with the IP address of the RPi and the stars in the “gateway” with the IP address of the router (if you don’t know, I think you can leave the line off). My configuration is address of 192.168.0.25 and a gateway of 192.168.0.1.
Now you are ready to use a SSH client to access your RPi’s terminal. I have only used one client, PuTTY, so I cannot tell you that it is the “best” client, however I can tell you that it works. Let’s install it on your Windows machine.
Install PuTTY on Windows
Go to this website on your Windows machine: http://www.chiark.greenend.org.uk/~sgtatham/putty/download.html
Select the proper download for your configuration
Once it’s done, run the executable (it’s probably called putty.exe)
In the “Host Name (or IP Address)” field type the IP address of your RPi
In the “Load, save, or delete a stored session” area, type a name in the textbox (I used RPi) and click on “Save”
Click Open

PuTTY Configuration Window Hopefully you should see something like this:
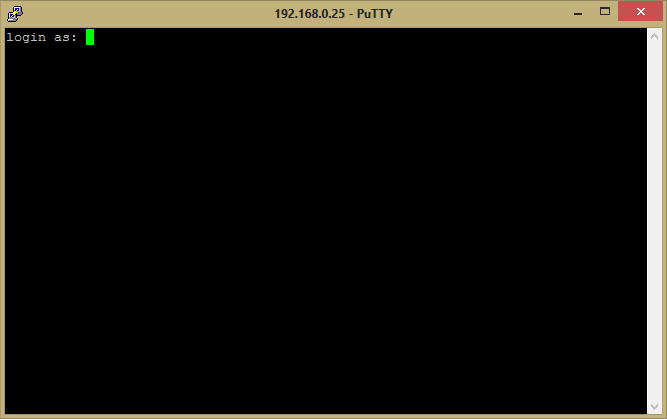
PuTTY asking for login information If that doesn’t work, try to restart your RPi. If that doesn’t help, Google will probably be of great assistance.
Now enter in your username and password. You are now logged in to a SSH session on the RPi (I don’t know if that is the right terminology, but I’ll pretend that it is).
You have now successfully SSHed in to your RPi. Now you can run commands on the
RPi from your computer. Now, what happens when you try to run startx? Nothing.
It doesn’t work. What can we do about that? Well, we can install XRDP to allow
us to use Remote Desktop Connection in Windows to access the desktop. Let’s do
that now.
Install XRDP
Run this command:
sudo apt-get install xrdpFollow the prompts to install XRDP
Restart your RPi
Now go Windows side and run Remote Desktop Connection. In Windows 8, press the start button and type “remote desktop connection” and press Enter
In the “Computer” field type the IP address of you RPi and click “Connect”
You should see a window thing like this
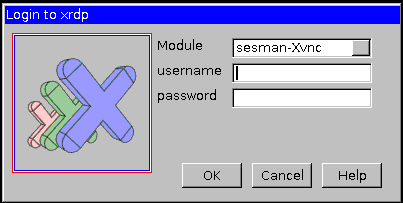
Login to XRDP Window Enter your username and password into the fields and click on “OK”
Wait a few moments and you will see your desktop
Now you can access your RPi’s terminal and desktop from your Windows computer.
UPDATE: If you want to be automatically logged in to your desktop session when you use Remote Desktop Connection to your RPi follow these steps:
- Follow the instructions under “Install XRDP” but stop at step 4
- If you haven’t already entered in the IP address, do so now
- Click on “Show Options”
- In the “User name:” field enter in your RPi username (it’s probably “pi”)
- Check the “Allow me to save credentials” checkbox
- Click “Connect”
- Enter your password
- Check the “Remember my credentials” checkbox
- Click “OK”
- Now you will not have to log in the next time you want to RDP into your RPi